Stable Diffusion Tutorial (Deprecated)
Three days ago Stable Diffusion was publicly released and today I am bringing to you an easy way of using the model without the need of having any kind of extra hardware, just your laptop and wifi connection. At the end I will also leave a script in case you do have some extra hardware and want to put that RTX 3080 to good use.
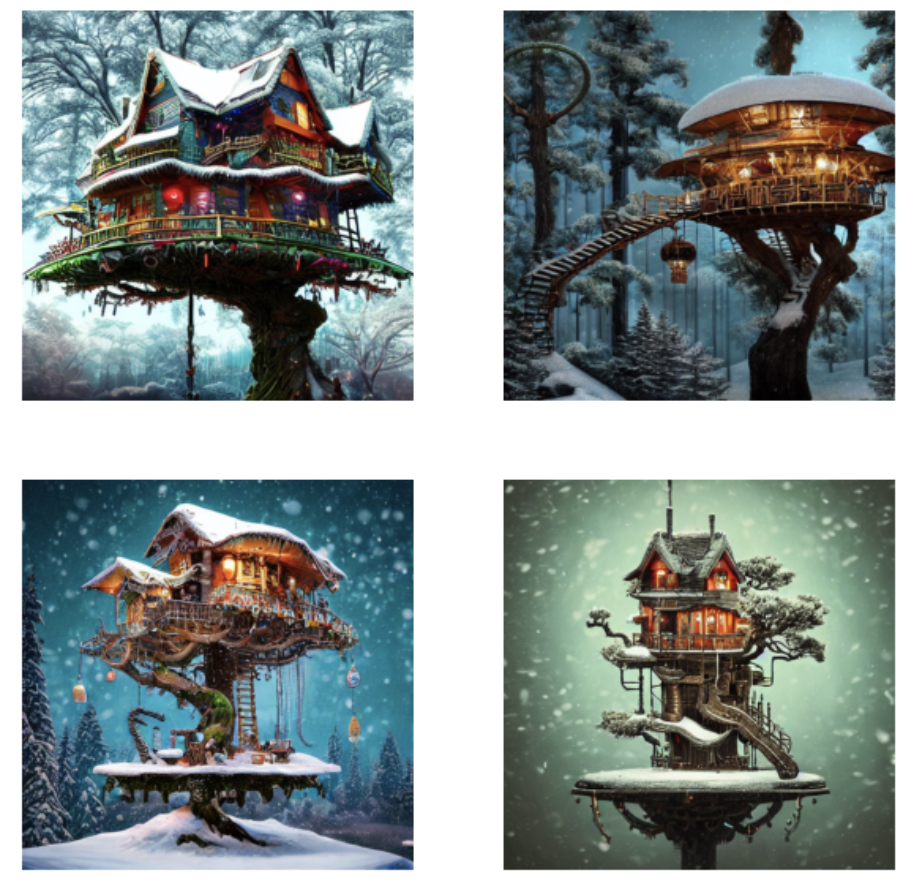
In case any of you didn’t know what Stable Diffusion is, it is similar to DALLE·2. It is a diffusion model able to create images from text. For example, for the prompt “Amazing, complex, intricate and highly detailed treehouse in a snow covered bonsai tree on top of a table, steampunk, vibrant colors, vibrant, beautiful, contrast, neon highlights, Highly detailed, ray tracing, digital painting, artstation, concept art, smooth, sharp focus, illustration, art by Beeple, Mike Winklemann, 8k” you get this amazing result.

If you want to be able to produce this astonishing images with just a few words and 20 seconds of computation continue reading. In the internet you may find many tutorials for using this model on Colab. However, the Colab notebooks sometimes don’t give you access to GPU resources and so you may take several minutes to generate one single image. To avoid that we are goint to run Stable Diffusion in Kaggle, their servers provide you with 30 weekly hours of GPU computation, which roughly translates to 5000 generated images, more than neccessary to satisfy your needs.
The first step you need to do is to create a Kaggle and HuggingFace account. The Kaggle account is to have access to GPUs as I said before, and the HuggingFace account is to have access to the Stable Diffusion model. I’ll go step by step. Let’s create the HuggingFace account. Go to https://huggingface.co/.

At the top right click on Sign Up.

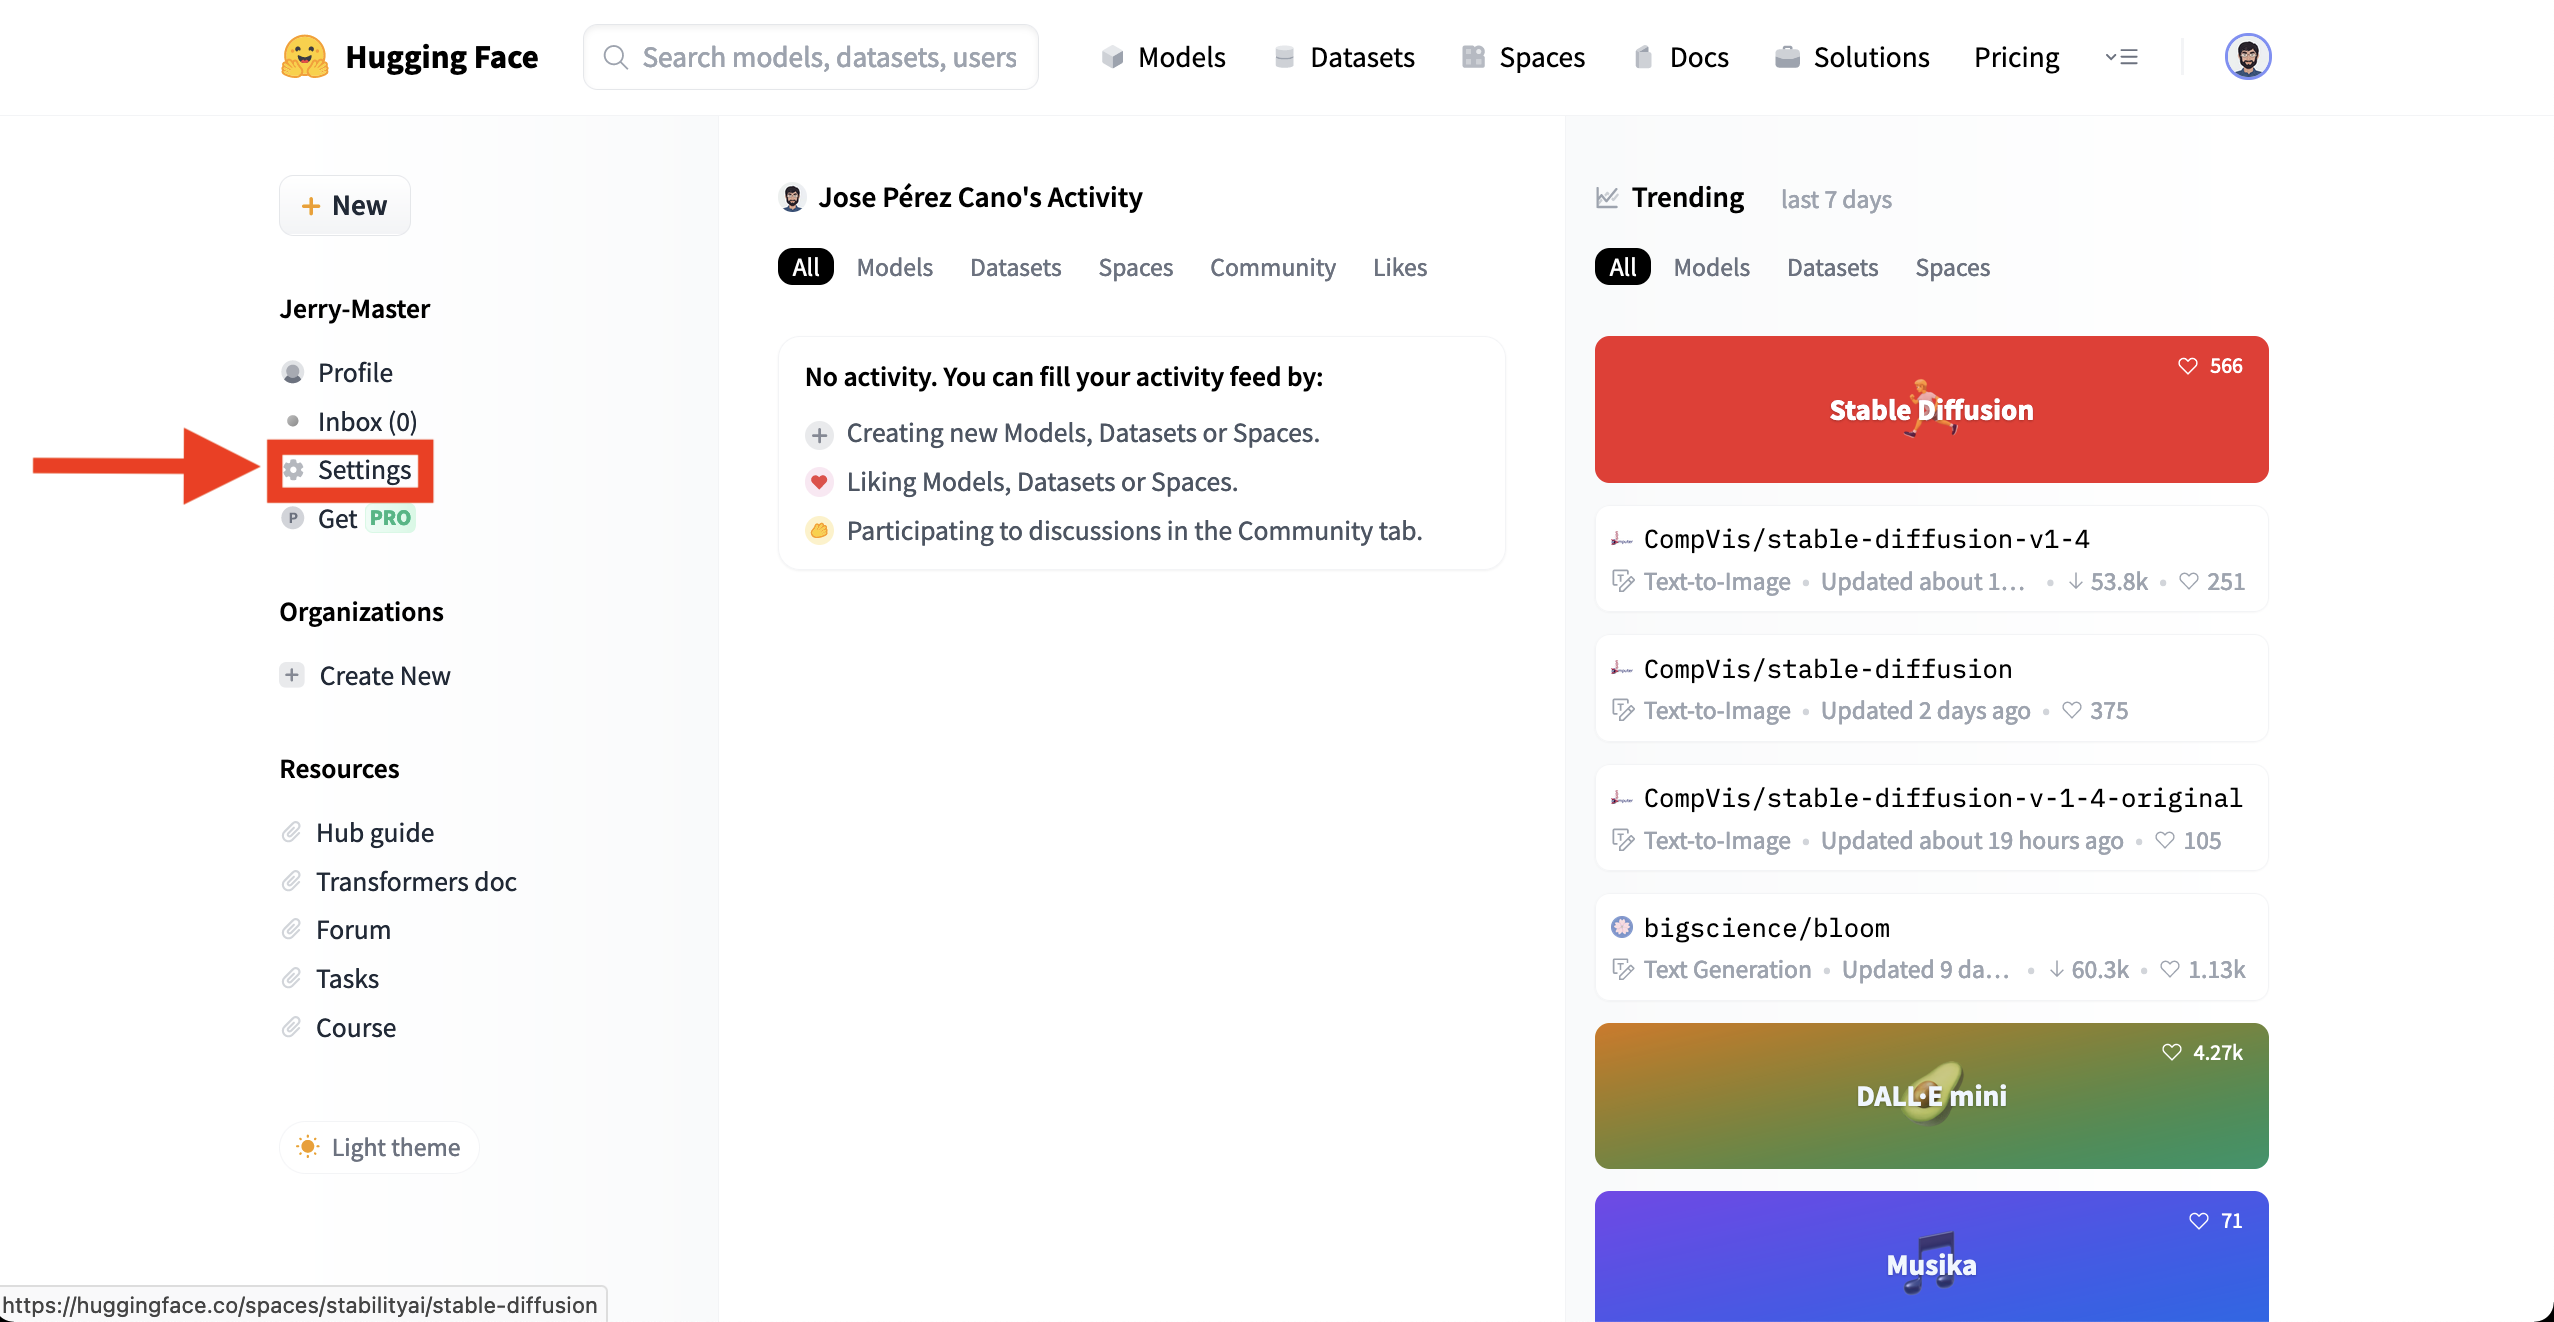
Follow the steps and log in with your account. Then, when you are logged in go to Settings as showed in the next image.
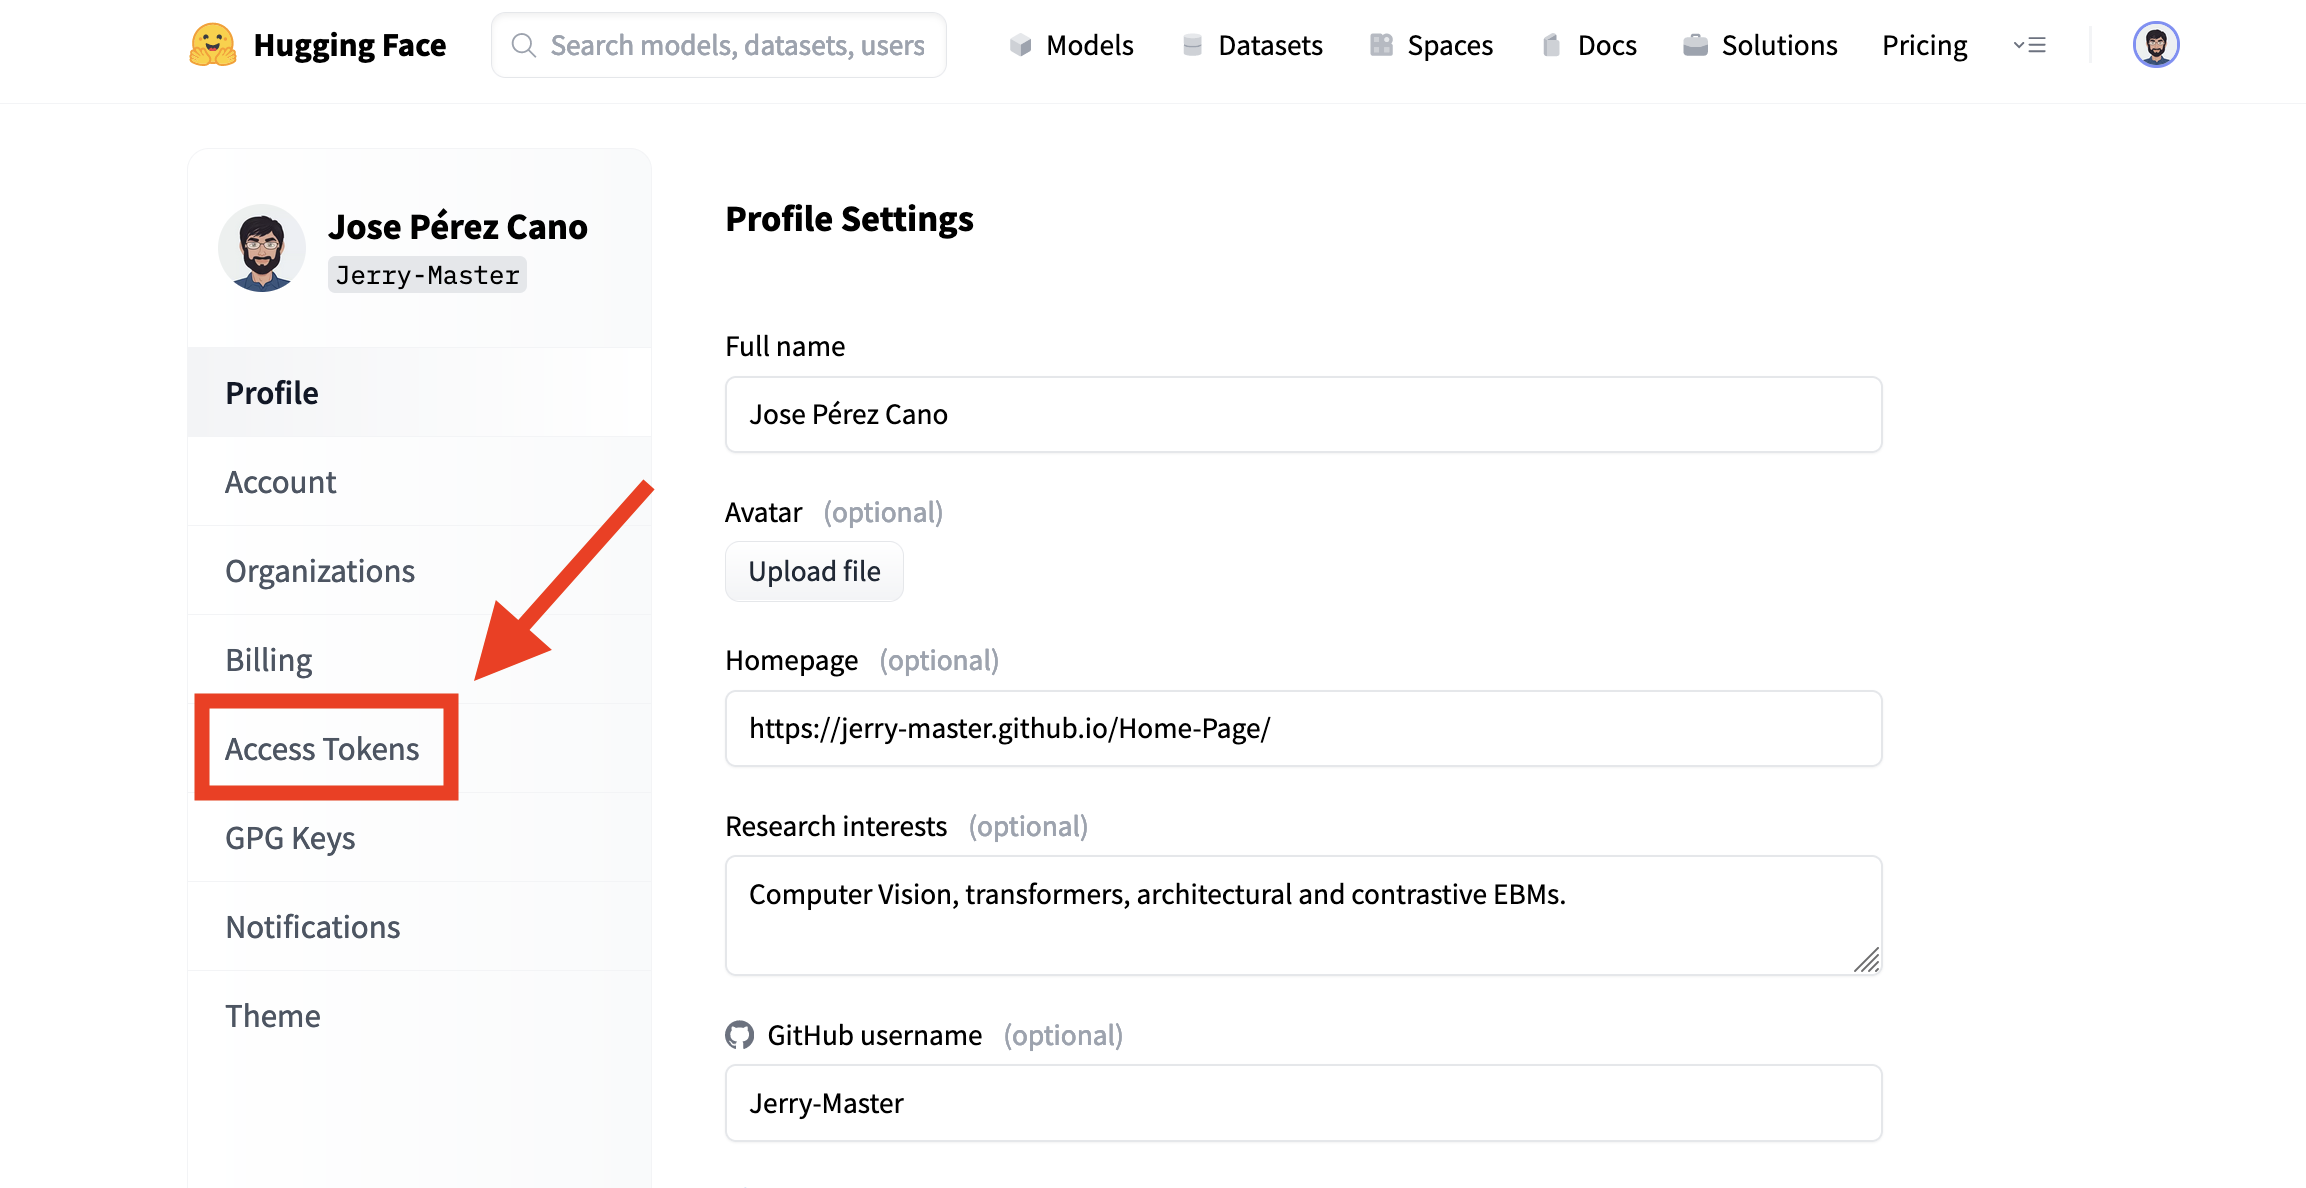
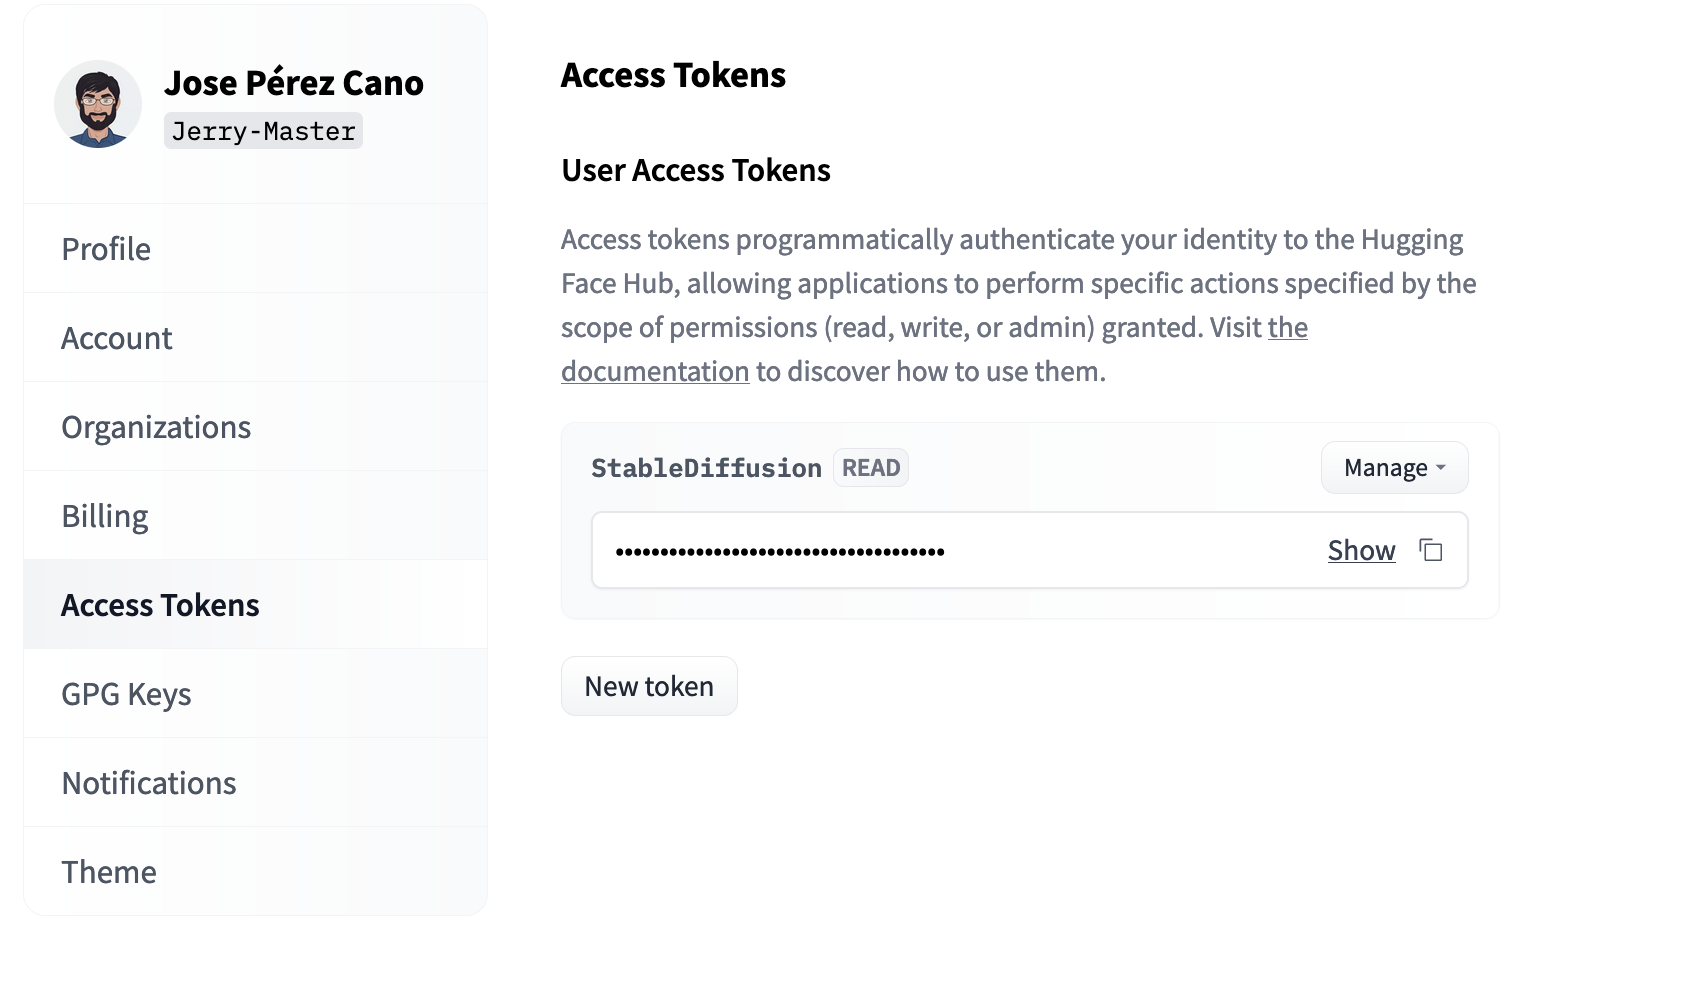
Now, go to the Access Tokens section.
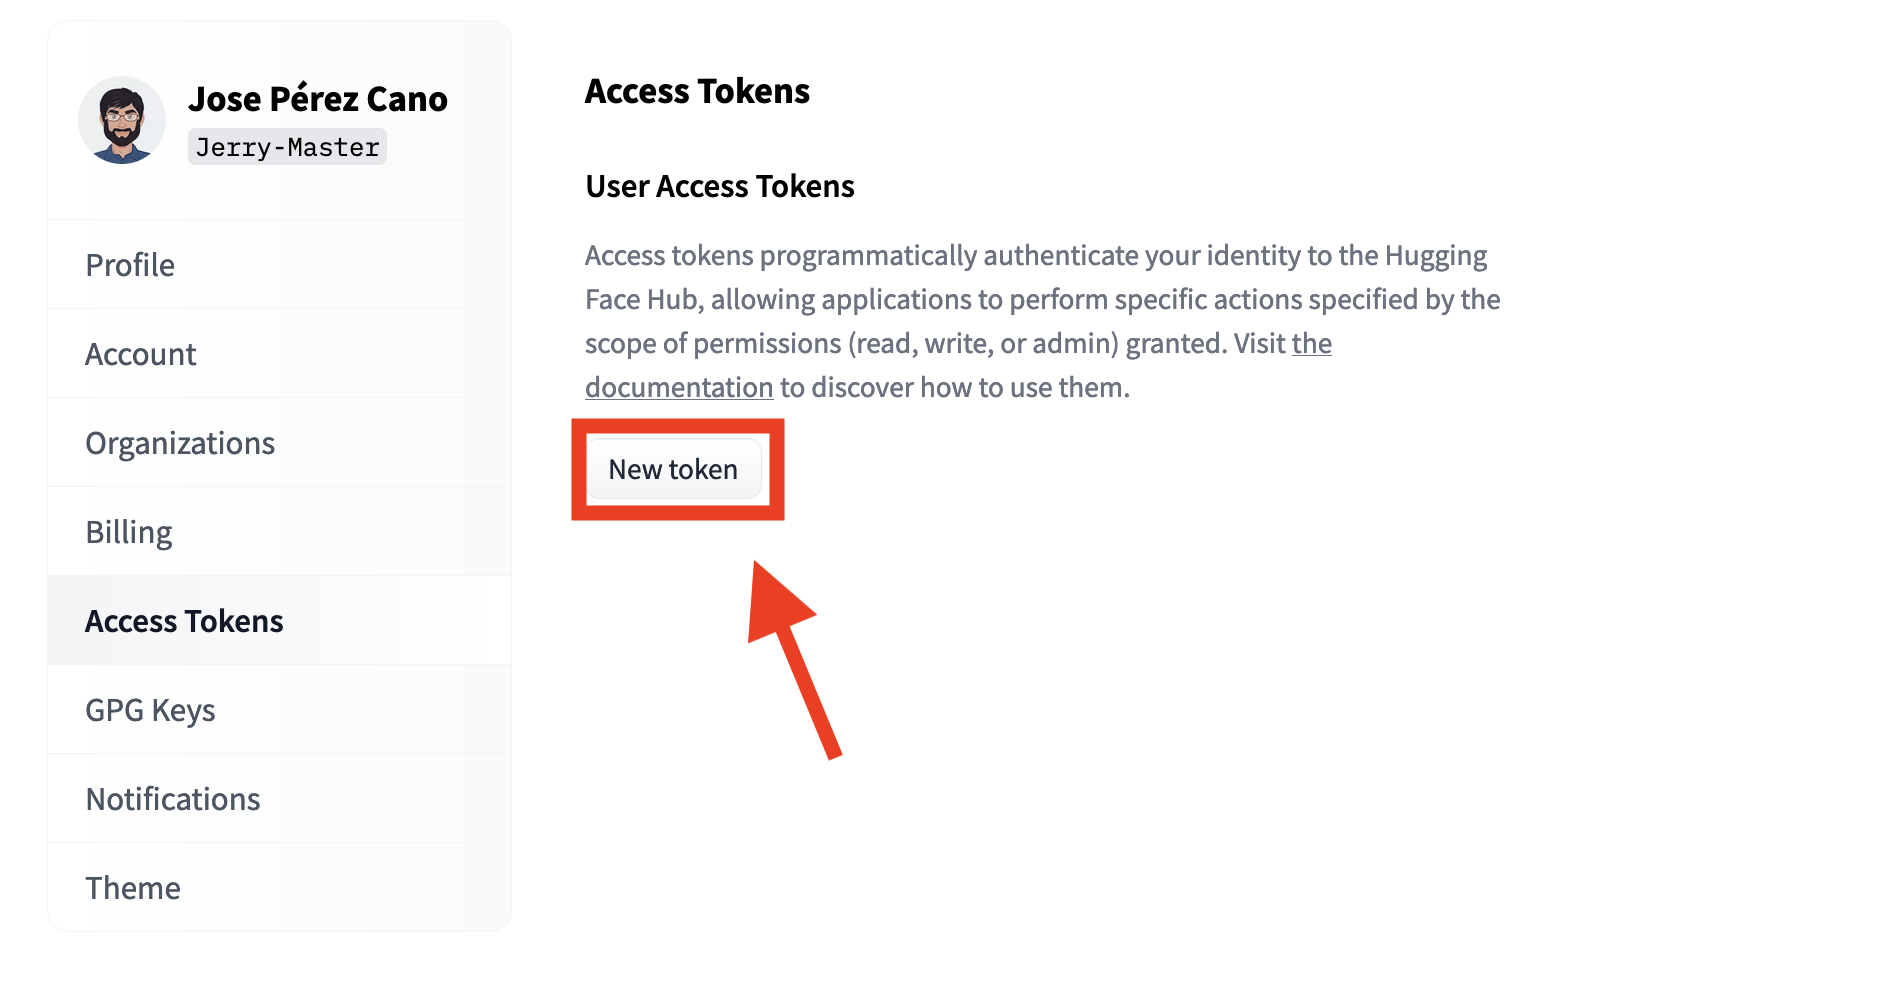
Finally, let’s create our needed token. Click on New token.
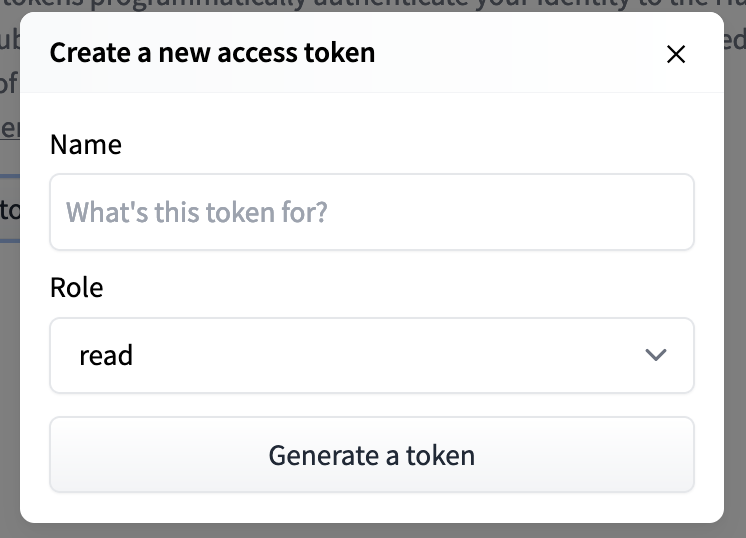
Enter any name you like, I will use StableDiffusion for obvious reasons. You can use write or read permissions, but you only need read permissions so I advise you to leave it like that.
And you should end up with something like this. Copy the token and save it for later use in Kaggle.
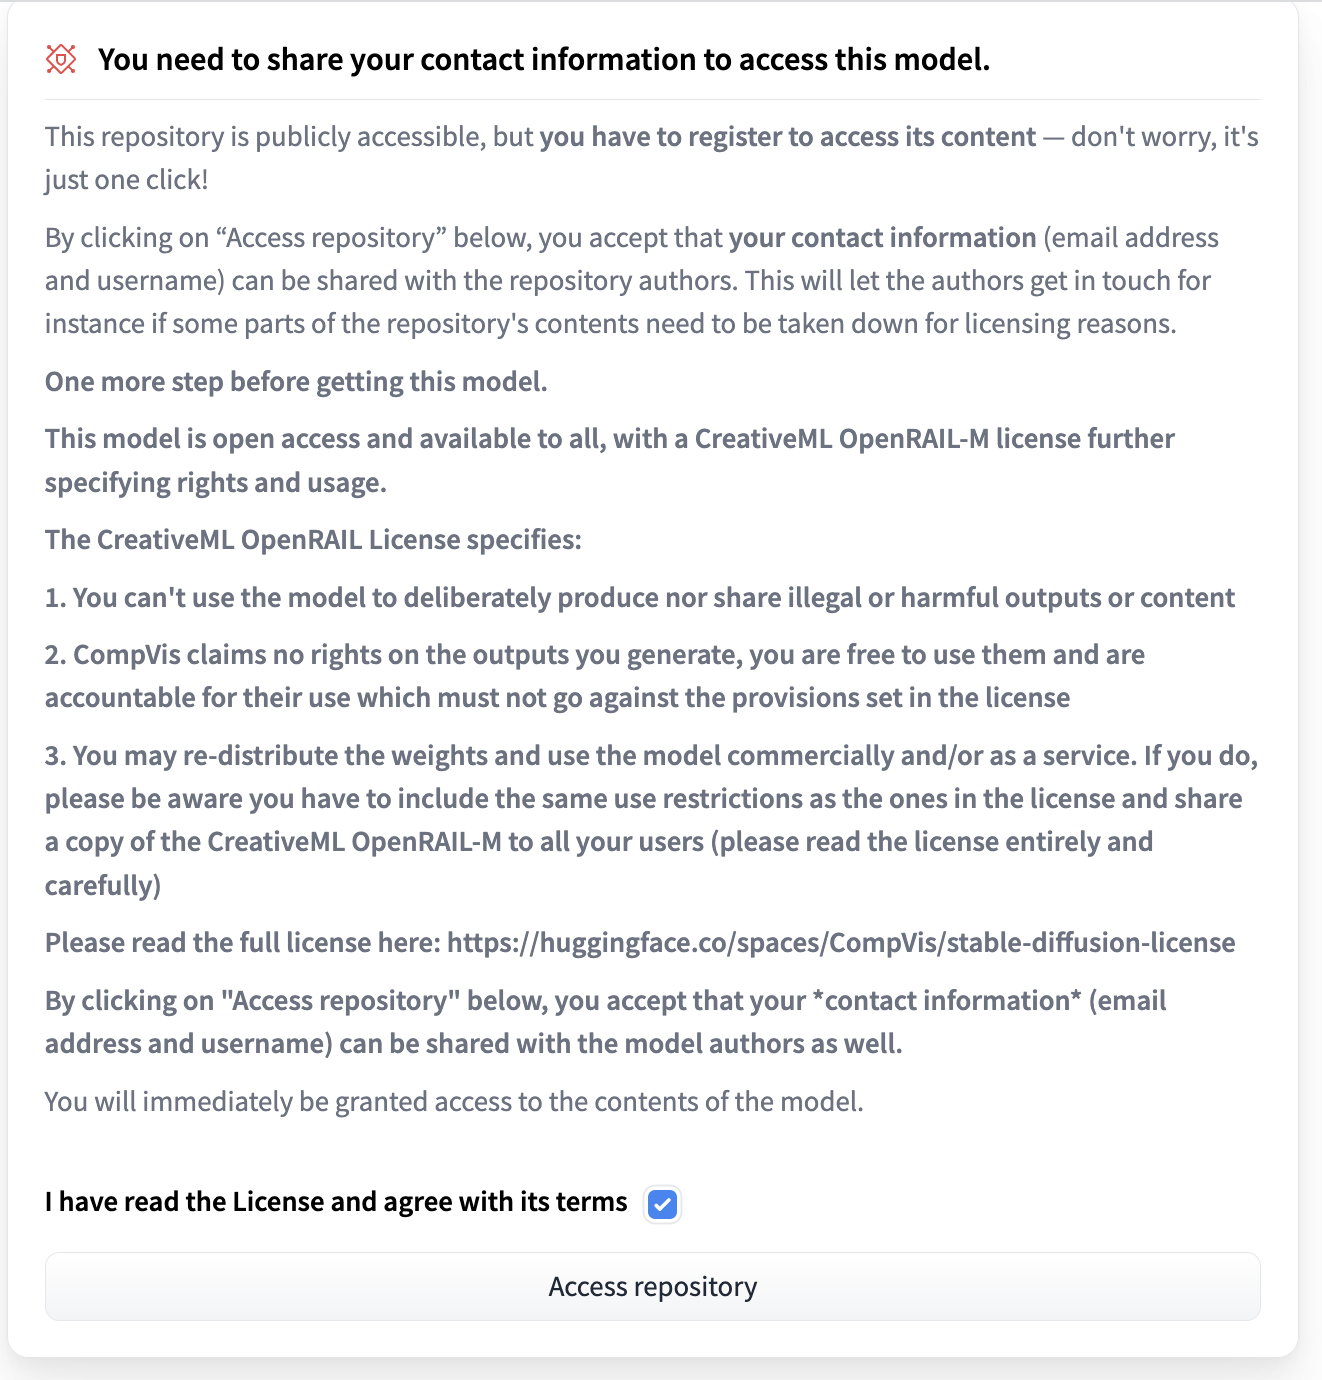
Before you can use this token, you need to agree to the terms and conditions of the Stable Diffusion model. Go to the page https://huggingface.co/CompVis/stable-diffusion-v1-4, access the repository and accept the terms and conditions. If you cannot see the tick box, you just need to log in.
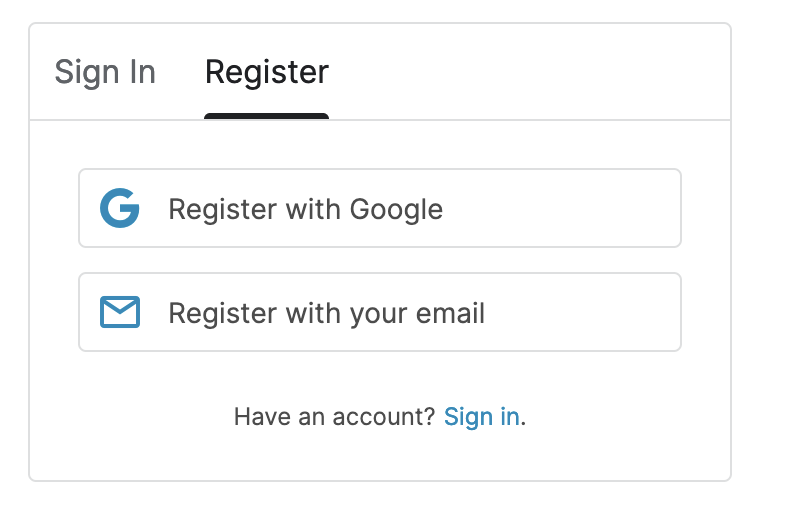
Same process, to create your account go to https://www.kaggle.com/ and register yourself.

Again, just follow the steps.
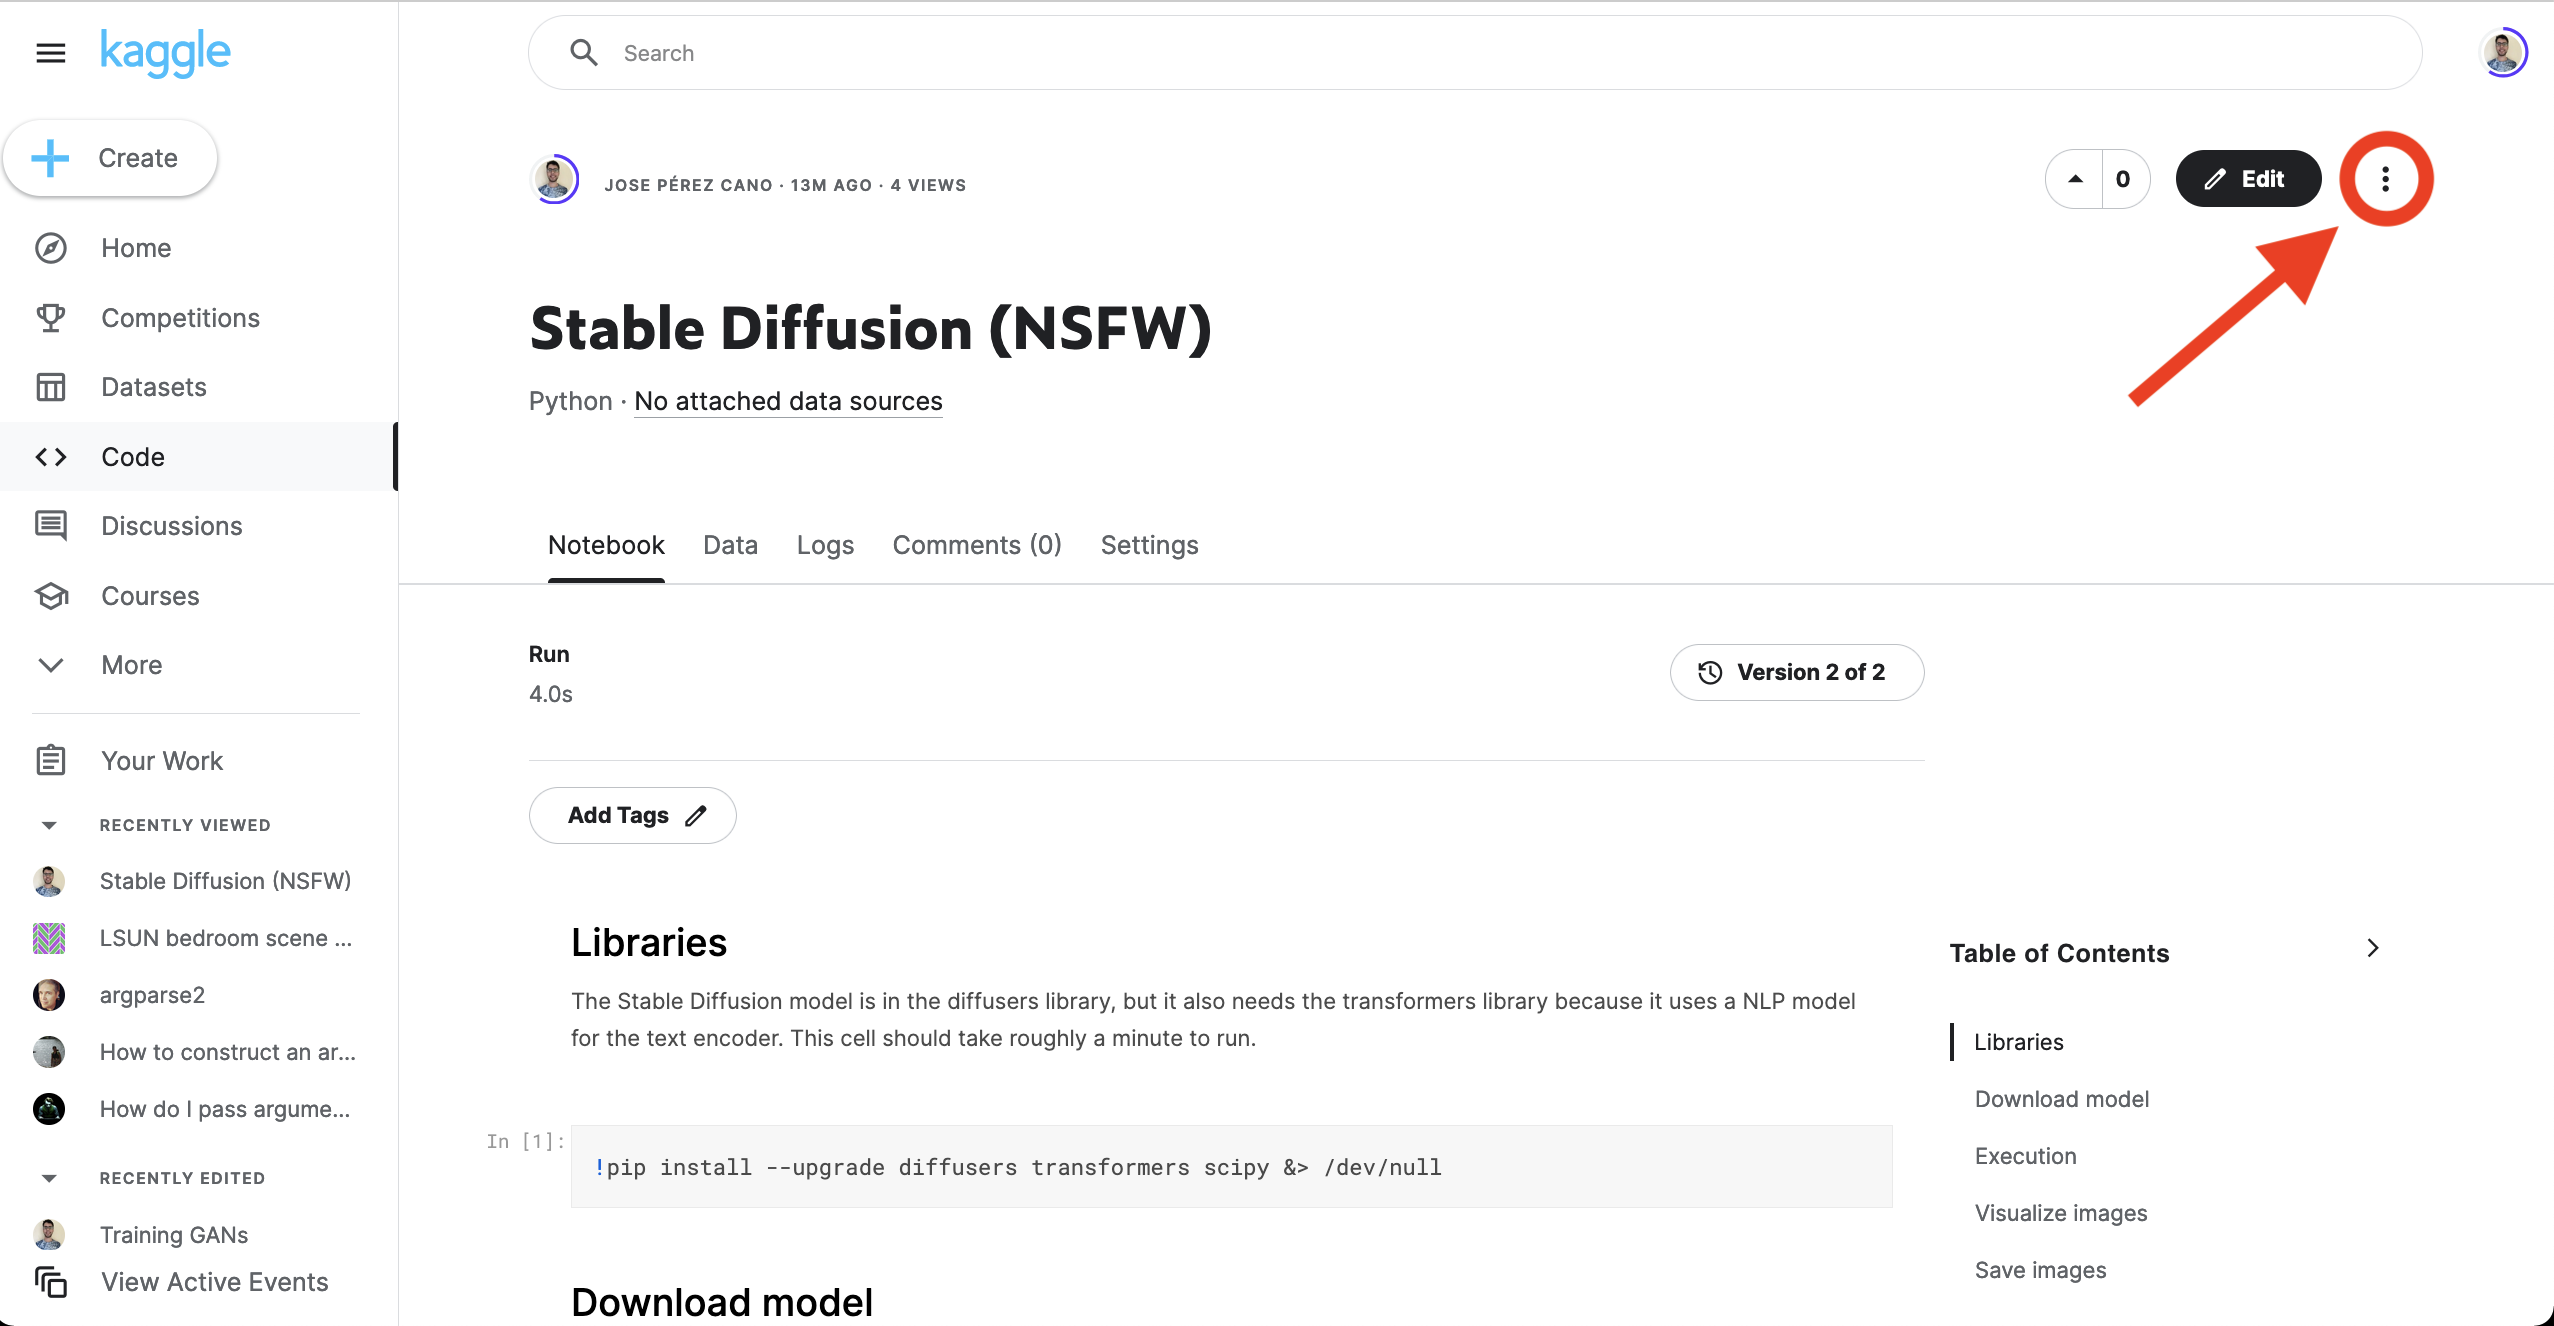
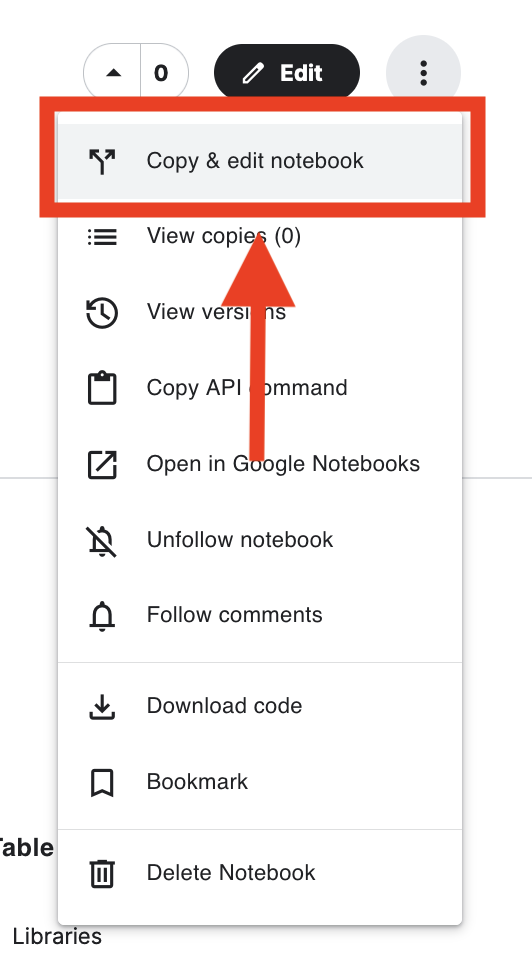
Once you are logged in, we can start generating images. I have created a notebook with everything explained. To go to the notebook just go to this link: https://www.kaggle.com/code/josepc/stable-diffusion-nsfw/notebook. You should see something like this. Click on the 3 dots at the top right corner. And then go to Copy & edit notebook.
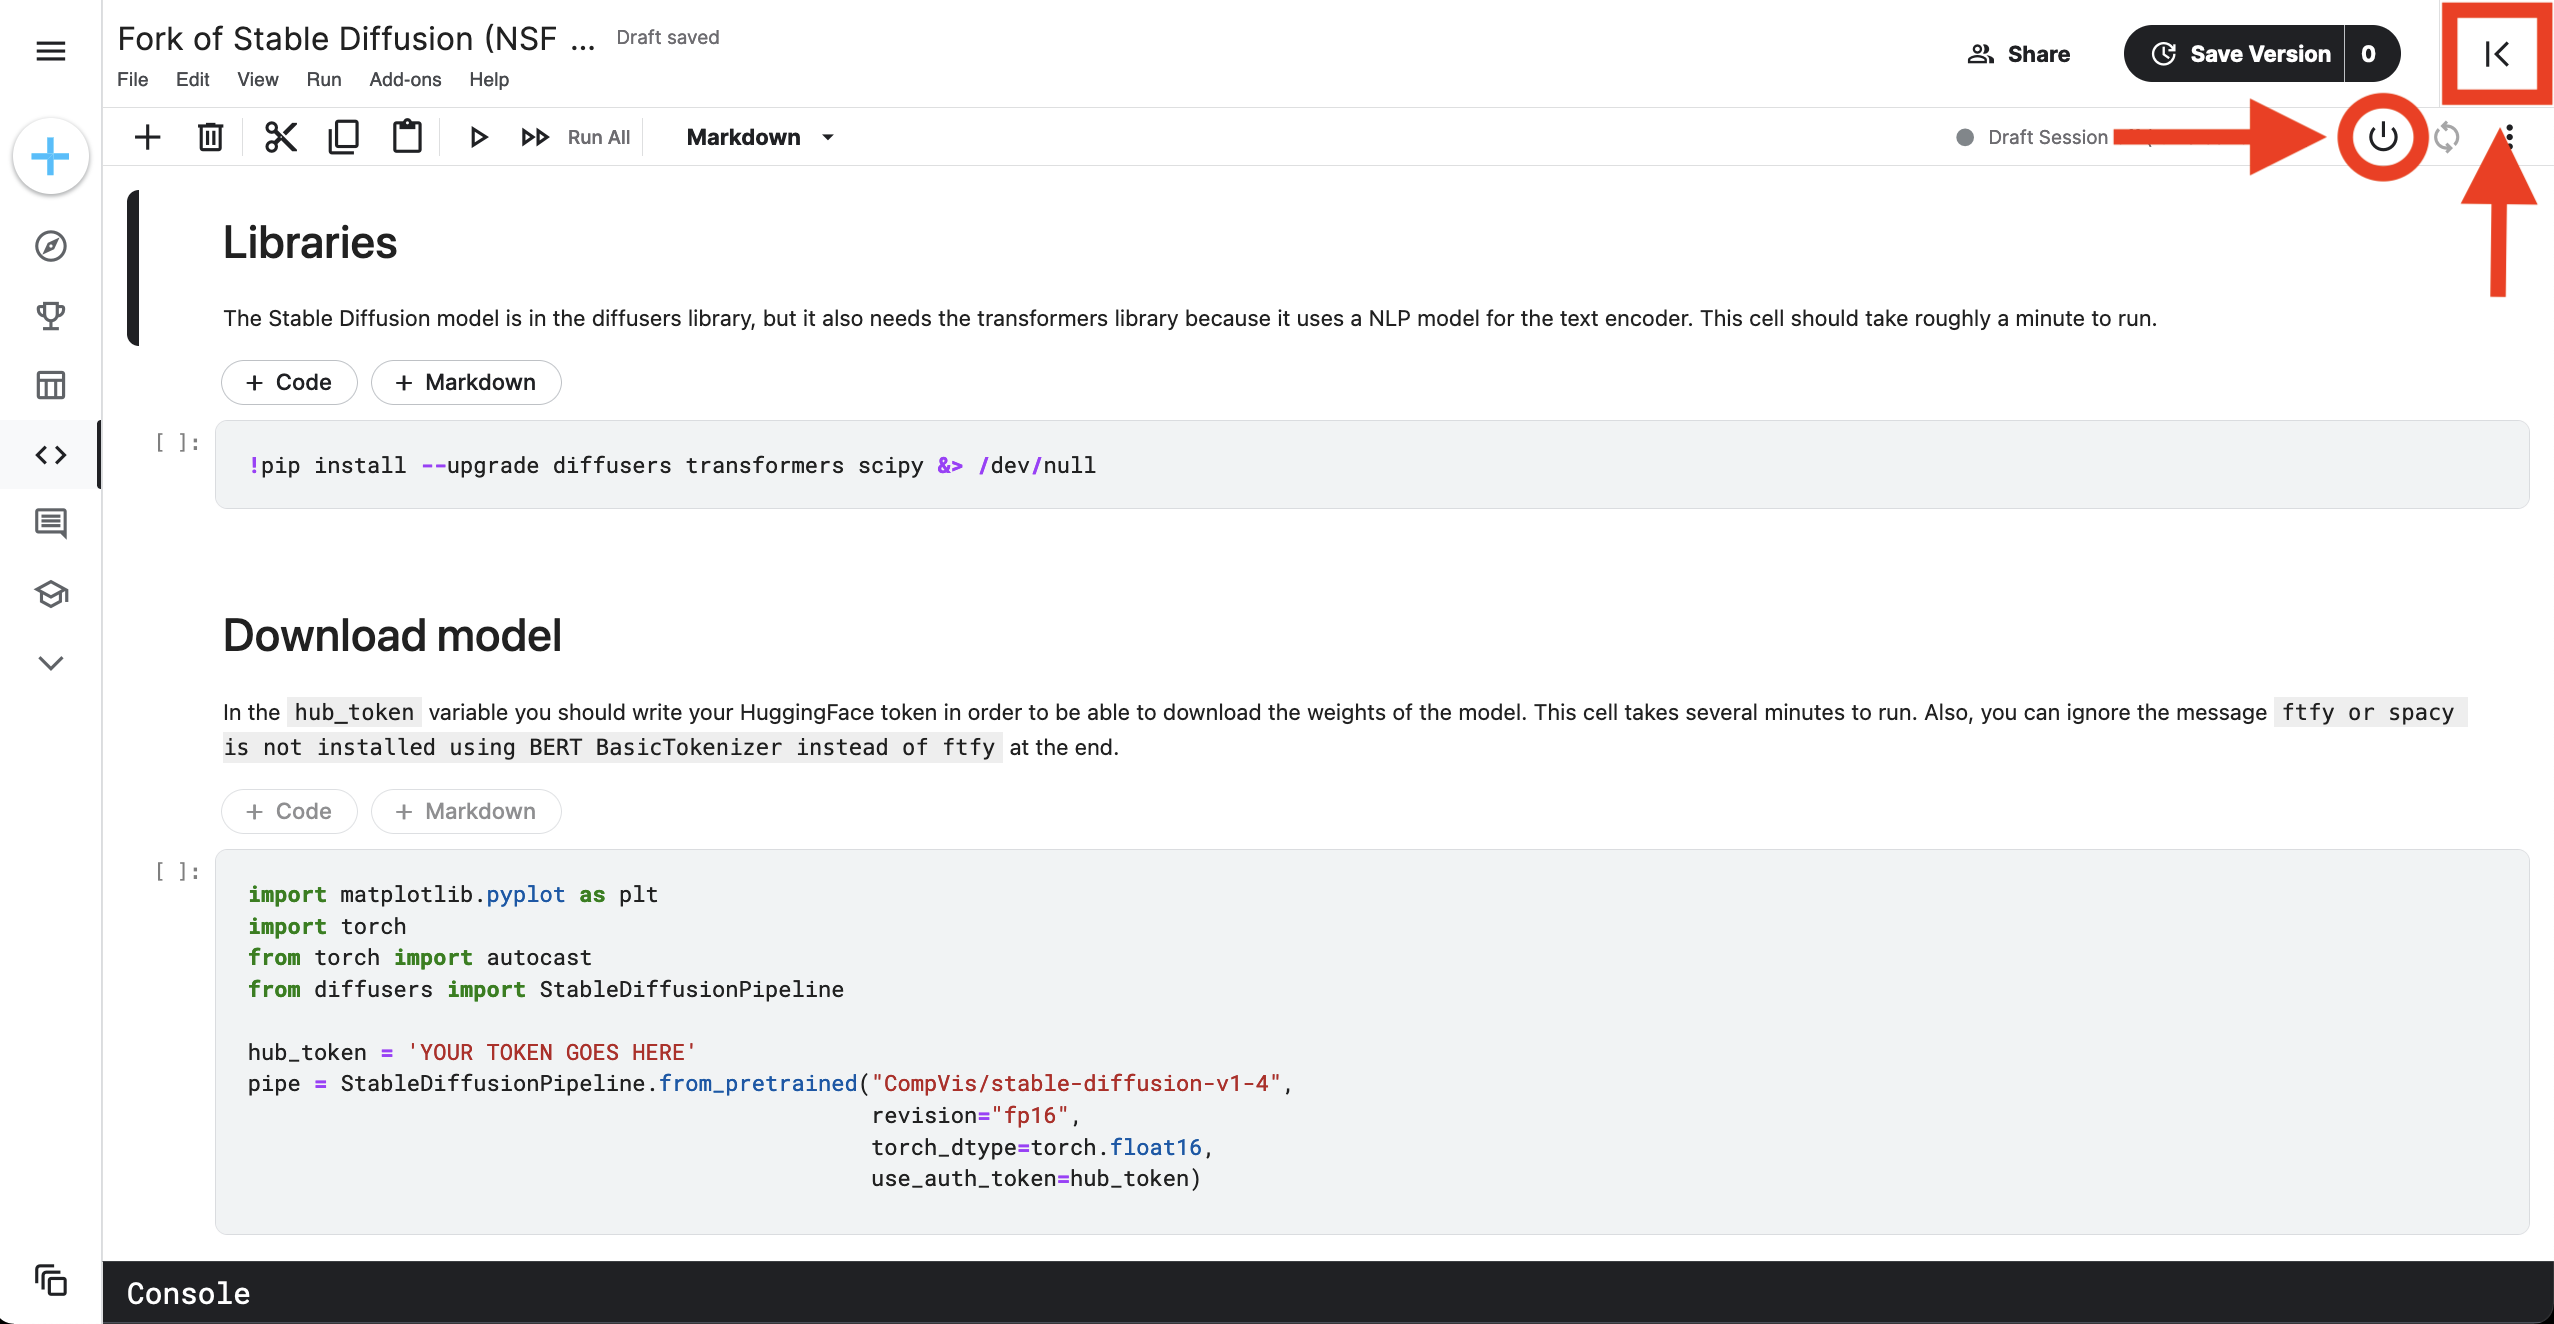
Ok, if it is your first time at kaggle there are a few things to explain before running the notebook. Once you are inside the notebook editor, to start the notebook you have to click the On button, but first you need to make sure the GPU is enabled and that the internet is enabled too. To do this, click the bottom right arrow.
You should see this,
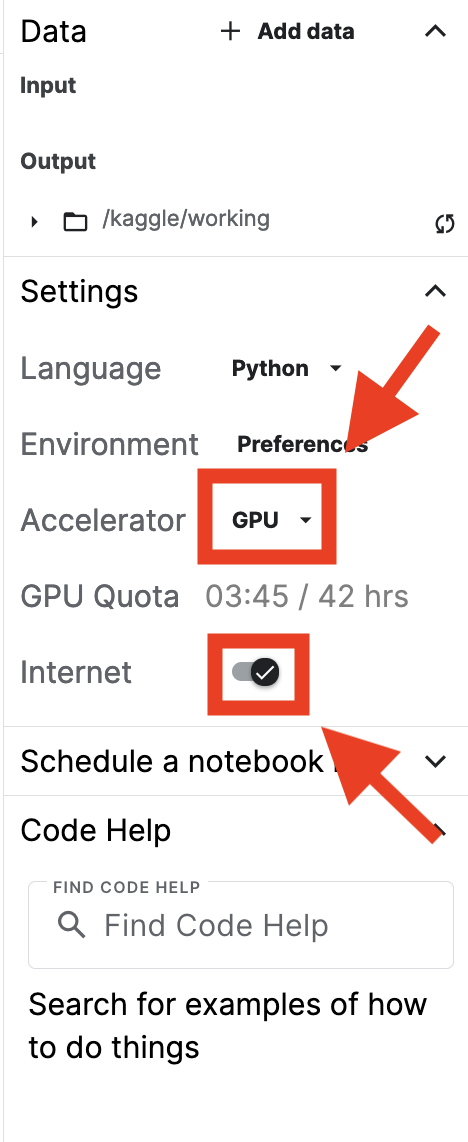
If you don’t see the GPU there, then click on it and set it to GPU. Leave everything else as it is and start the notebook. Once the notebook started some extra bars appear to show the GPU is running.

To run each cell, click on it and do shift+Enter. Everything is explained there, but I’ll go cell by cell again here explaining what you need to modify to make it work for you.

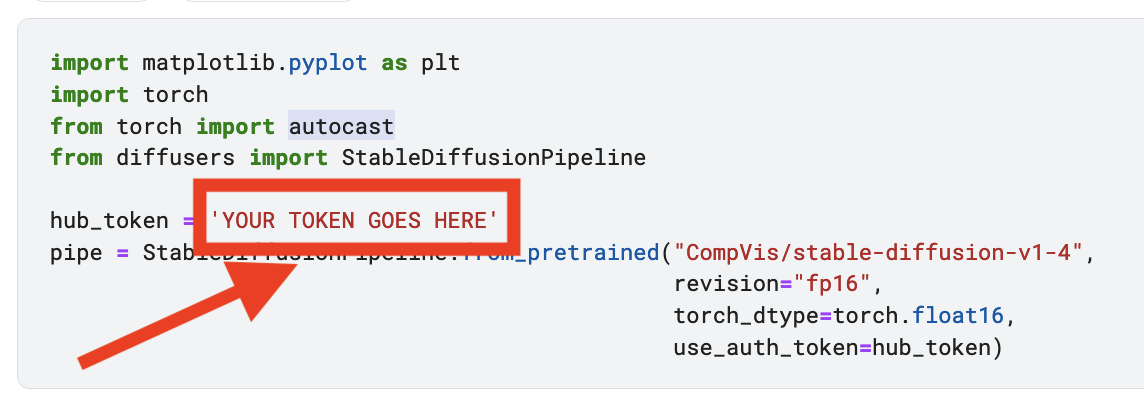
The first cell is just for installing libraries, run it as it is. The second one is where you actually need to enter your token. Modify the highlighted line copying there your HuggingFace token previously created. Keep in mind that the token should be enclosed by commas.
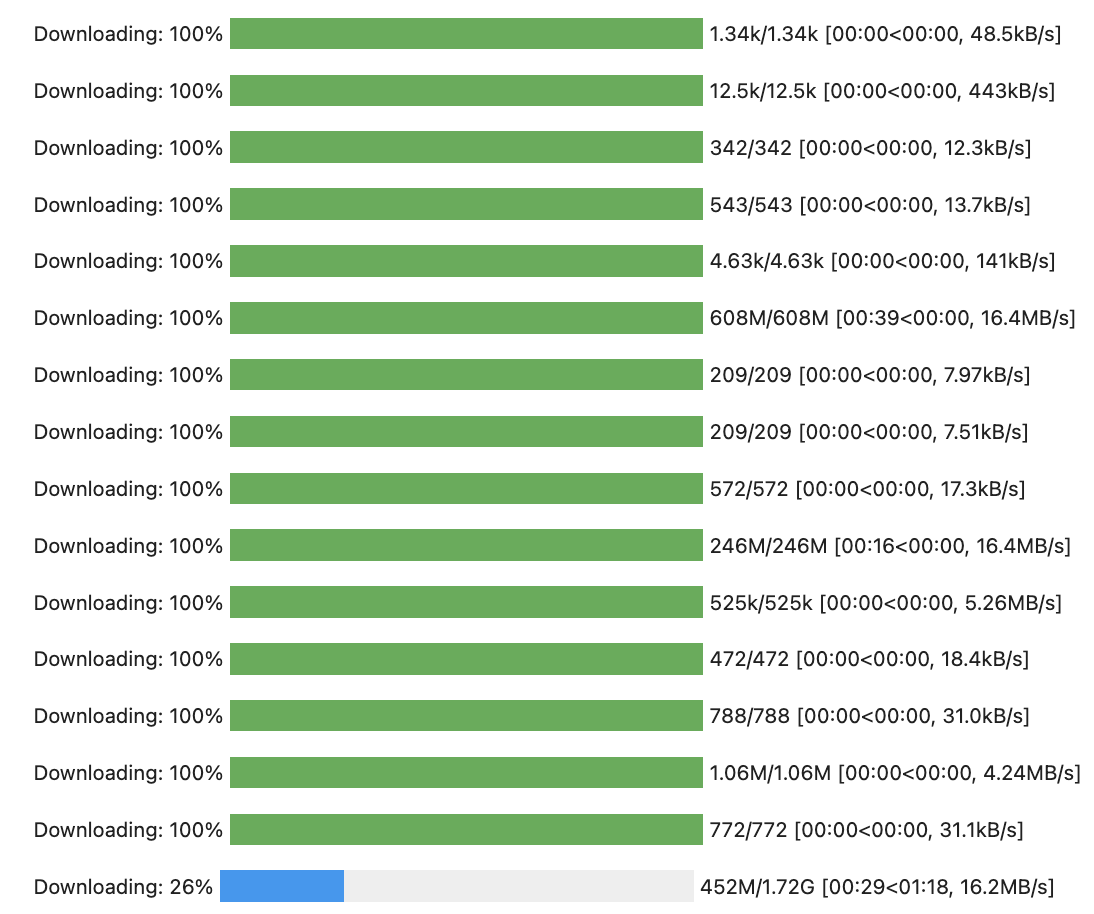
Once you hit shift+Enter, it will start downloading the model. It takes a few, you can see the progress like this. That 1.72G bar is the biggest one, when that is finished you are almost done.
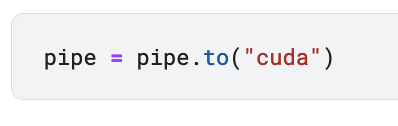
The third cell is for moving the model to the GPU, just run it normally with shift+Enter.
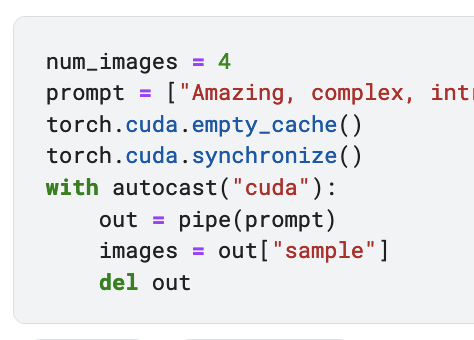
The fourth cell is the important one, here is where you are actually generating the images. There are two variables that you need to modify. The first one is num_images, set it to the number of images you want to generate from a given prompt, but I advise you not to use more than 4 images at once for reasons I will mention at the end. The second variable is the prompt variable, modify it to include your desired prompt. Delete the text in between commas (it is quite big) and write what you want. The result should be something like this: prompt = ['GIVEN TEXT'] * num_images, don’t change the format or it won’t work. Just write your prompt inside the commas.
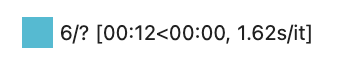
Once you hit shift+Enter, a progress bar will appear. When the value reaches 51 you are done. It takes nearly 20 seconds per image.
The last two cells are for visualizing and saving the images. Just hit shift+Enter and there you have it, fabulous new images that noone has ever seen before.
Possible errors
There is the chance that you ran into an error call CUDA out of memory. When that happens, the only solution is to reset the notebook and rerun everything. If you create images in batches of 4, then it is quite difficult for that error to happen. But if for some reason you see a big red error message, just ignore it and restart your notebook. For those interested, the reason why that error happens is because there is a memory leakage into the GPU, the model creates some auxiliary tensors and then forgets of their existence. You cannot delete them because they are internal to the model, and the cache memory manager cannot delete them because they are still active, although never used. To solve it one would have to find the references of the allocated tensors and deallocate them manually, but it is easier to just restart the environment.
The error looks like this, so that it doesn’t take you by surprise. If you go to the end of the large message you will see this.

NSFW version
The tutorial I showed you is for using the standard Stable Diffusion version from Hugging Face which has a safety checker to ensure you don’t generate nasty images. However, since the model is Open Source, it is possible to modify the code to remove that safety checker. In the name of liberty, I created another version of the notebook removing that safety checker. If you go to the original link of the notebook, you will see that there is a box stating Version 2 of 2.
If you click it you can see the first version which contains two extra cells to remove the safety checker. You can run that version or copy those cells into your copy of the other version. These are the cells. The first one is for loading extra libraries, and the second one is the actual code removing the checker.
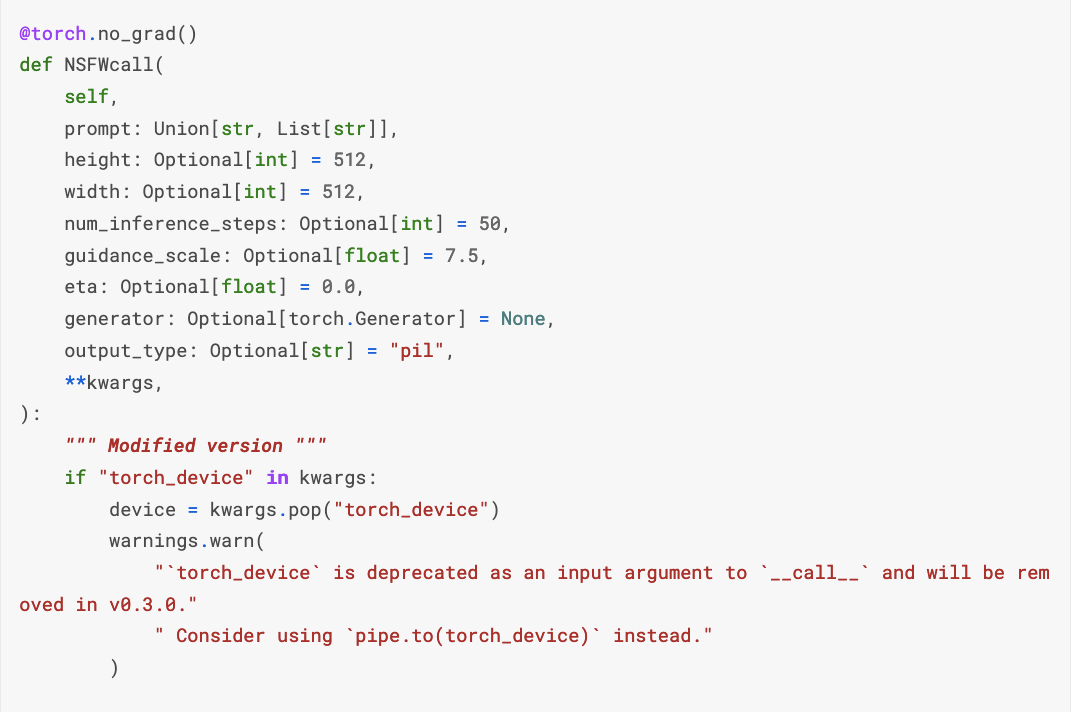
This last cell is quite large, but the only important change was done at the end. Commenting out those two lines is the only thing needed.

After removing the checker you just change the original call function with the modified one.

But you don’t need to understand this, just copy and use it. I have taken the time to make it work for you.
Script version
Since I have explained everything before I will just leave the script version here for those of you that have access to some server with GPUs or those of you rich enough to have GPUs in your houses. The usage is quite simple, there are only 3 flags that you need to know: the number of images to generate, the prompt and the token. The save_path can be left with the default value. The whole script is pasted below.
1
2
3
4
5
6
7
8
9
Creates several images from a given prompt.

optional arguments:
  -h, --help            Usage python3 StableDiffusion.py -n N --promp Text --token HuggingFaceToken [--save_path dir]]]
  -n N                  Number of images to output.
  --prompt PROMPT       Prompt to generate image.
  --token TOKEN         HuggingFace token to download the model.
  --save_path SAVE_PATH
                        Path to the folder to save the results.
import os
import inspect
import warnings
from typing import List, Optional, Union
import torch
from torch import autocast
from tqdm.auto import tqdm
from transformers import CLIPFeatureExtractor, CLIPTextModel, CLIPTokenizer
from diffusers.models import AutoencoderKL, UNet2DConditionModel
from diffusers.pipeline_utils import DiffusionPipeline
from diffusers.schedulers import DDIMScheduler, LMSDiscreteScheduler, PNDMScheduler
from diffusers import StableDiffusionPipeline
import argparse

parser = argparse.ArgumentParser(description='Creates several images from a given prompt.', add_help=False)
parser.add_argument('-h', '--help', action='help', default=argparse.SUPPRESS,
                    help='Usage python3 StableDiffusion.py -n N --promp Text --token HuggingFaceToken [--save_path dir]]]')
parser.add_argument('-n', type=int, default='1',
                    help='Number of images to output.')
parser.add_argument('--prompt', type=str,
                    help='Prompt to generate image.')
parser.add_argument('--token', type=str,
                    help='HuggingFace token to download the model.')
parser.add_argument('--save_path', type=str, default='outputs',
                    help='Path to the folder to save the results.')

args = parser.parse_args()

pipe = StableDiffusionPipeline.from_pretrained("CompVis/stable-diffusion-v1-4",
                                               revision="fp16",
                                               torch_dtype=torch.float16,
                                               use_auth_token=args.token)
print('Loaded model')

@torch.no_grad()
def NSFWcall(
    self,
    prompt: Union[str, List[str]],
    height: Optional[int] = 512,
    width: Optional[int] = 512,
    num_inference_steps: Optional[int] = 50,
    guidance_scale: Optional[float] = 7.5,
    eta: Optional[float] = 0.0,
    generator: Optional[torch.Generator] = None,
    output_type: Optional[str] = "pil",
    **kwargs,
):
    """ Modified version to remove the NSFW filter. """
    if "torch_device" in kwargs:
        device = kwargs.pop("torch_device")
        warnings.warn(
            "`torch_device` is deprecated as an input argument to `__call__` and will be removed in v0.3.0."
            " Consider using `pipe.to(torch_device)` instead."
        )

        # Set device as before (to be removed in 0.3.0)
        if device is None:
            device = "cuda" if torch.cuda.is_available() else "cpu"
        self.to(device)

    if isinstance(prompt, str):
        batch_size = 1
    elif isinstance(prompt, list):
        batch_size = len(prompt)
    else:
        raise ValueError(f"`prompt` has to be of type `str` or `list` but is {type(prompt)}")

    if height % 8 != 0 or width % 8 != 0:
        raise ValueError(f"`height` and `width` have to be divisible by 8 but are {height} and {width}.")

    # get prompt text embeddings
    text_input = self.tokenizer(
        prompt,
        padding="max_length",
        max_length=self.tokenizer.model_max_length,
        truncation=True,
        return_tensors="pt",
    )
    text_embeddings = self.text_encoder(text_input.input_ids.to(self.device))[0]

    # here `guidance_scale` is defined analog to the guidance weight `w` of equation (2)
    # of the Imagen paper: https://arxiv.org/pdf/2205.11487.pdf . `guidance_scale = 1`
    # corresponds to doing no classifier free guidance.
    do_classifier_free_guidance = guidance_scale > 1.0
    # get unconditional embeddings for classifier free guidance
    if do_classifier_free_guidance:
        max_length = text_input.input_ids.shape[-1]
        uncond_input = self.tokenizer(
            [""] * batch_size, padding="max_length", max_length=max_length, return_tensors="pt"
        )
        uncond_embeddings = self.text_encoder(uncond_input.input_ids.to(self.device))[0]

        # For classifier free guidance, we need to do two forward passes.
        # Here we concatenate the unconditional and text embeddings into a single batch
        # to avoid doing two forward passes
        text_embeddings = torch.cat([uncond_embeddings, text_embeddings])

    # get the intial random noise
    latents = torch.randn(
        (batch_size, self.unet.in_channels, height // 8, width // 8),
        generator=generator,
        device=self.device,
    )

    # set timesteps
    accepts_offset = "offset" in set(inspect.signature(self.scheduler.set_timesteps).parameters.keys())
    extra_set_kwargs = {}
    if accepts_offset:
        extra_set_kwargs["offset"] = 1

    self.scheduler.set_timesteps(num_inference_steps, **extra_set_kwargs)

    # if we use LMSDiscreteScheduler, let's make sure latents are mulitplied by sigmas
    if isinstance(self.scheduler, LMSDiscreteScheduler):
        latents = latents * self.scheduler.sigmas[0]

    # prepare extra kwargs for the scheduler step, since not all schedulers have the same signature
    # eta (η) is only used with the DDIMScheduler, it will be ignored for other schedulers.
    # eta corresponds to η in DDIM paper: https://arxiv.org/abs/2010.02502
    # and should be between [0, 1]
    accepts_eta = "eta" in set(inspect.signature(self.scheduler.step).parameters.keys())
    extra_step_kwargs = {}
    if accepts_eta:
        extra_step_kwargs["eta"] = eta

    for i, t in tqdm(enumerate(self.scheduler.timesteps)):
        # expand the latents if we are doing classifier free guidance
        latent_model_input = torch.cat([latents] * 2) if do_classifier_free_guidance else latents
        if isinstance(self.scheduler, LMSDiscreteScheduler):
            sigma = self.scheduler.sigmas[i]
            latent_model_input = latent_model_input / ((sigma**2 + 1) ** 0.5)

        # predict the noise residual
        noise_pred = self.unet(latent_model_input, t, encoder_hidden_states=text_embeddings)["sample"]

        # perform guidance
        if do_classifier_free_guidance:
            noise_pred_uncond, noise_pred_text = noise_pred.chunk(2)
            noise_pred = noise_pred_uncond + guidance_scale * (noise_pred_text - noise_pred_uncond)

        # compute the previous noisy sample x_t -> x_t-1
        if isinstance(self.scheduler, LMSDiscreteScheduler):
            latents = self.scheduler.step(noise_pred, i, latents, **extra_step_kwargs)["prev_sample"]
        else:
            latents = self.scheduler.step(noise_pred, t, latents, **extra_step_kwargs)["prev_sample"]

    # scale and decode the image latents with vae
    latents = 1 / 0.18215 * latents
    image = self.vae.decode(latents)

    image = (image / 2 + 0.5).clamp(0, 1)
    image = image.cpu().permute(0, 2, 3, 1).numpy()

    # run safety checker
    #safety_cheker_input = self.feature_extractor(self.numpy_to_pil(image), return_tensors="pt").to(self.device)
    #image, has_nsfw_concept = self.safety_checker(images=image, clip_input=safety_cheker_input.pixel_values)

    if output_type == "pil":
        image = self.numpy_to_pil(image)

    return {"sample": image, "nsfw_content_detected": False}

# Change the call function to remove NSFW filter
StableDiffusionPipeline.__call__ = NSFWcall
print('Removed NSFW filter')
pipe = pipe.to("cuda")
print('Loaded model into GPU')

prompts = [args.prompt] * args.n
with autocast("cuda"):
    images = pipe(prompts)["sample"]
print('Executed model')
if args.save_path[-1] == '/':
    args.save_path = args.save_path[:-1]
if not os.path.isdir(args.save_path):
    os.mkdir(args.save_path)
for i, image in enumerate(images):
    image.save(args.save_path+"/output"+str(i)+".png")
print('Saved images')